
In this post, we reveal the top 5 cookie recipes to use with your embossed rolling pins. We have everything from recipes for stamped vanilla almond cookies to embossed spiced brown sugar cookies. Read on!
Introduction
There are very few things that elicit the same reaction you get from surprising people with a tray of cookies. Regardless of who you are or what the social setting is, people light up like Christmas, transported temporarily back to a state of child-like wonder. Eyes widen, mouths open, and someone will inevitably let out the joyful cry of “cookies!” It’s instantaneous, too, and often catches them off-guard; see them try to compose themselves after realizing they’d just beamed with unfettered delight like a child reacting to a cute puppy on the sidewalk. All because someone brought out some cookies.
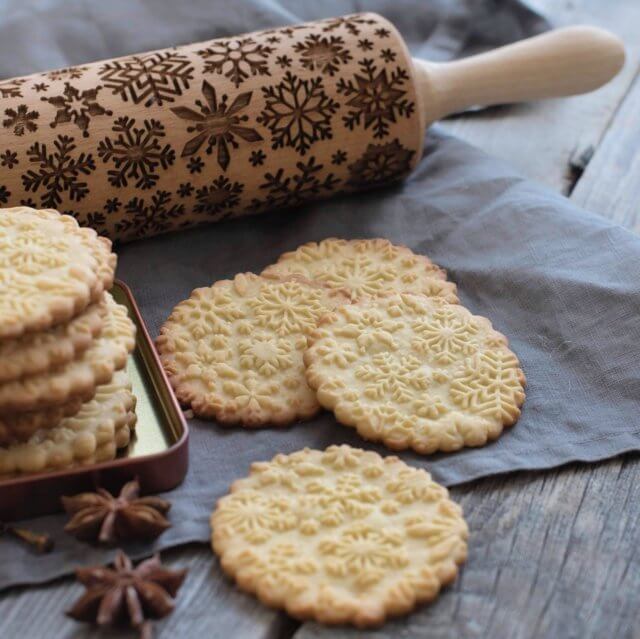
Cookies are the very definition of comfort food. There’s just something inherently wholesome about sharing a freshly-made batch of cookies with friends, family, or even strangers (though these strangers will likely transition quickly into friends once you’ve shared your baked goods with them). Likely due to their association as a homemade childhood treat, cookies feel special, like they were lovingly prepared for the recipient. And one thing that can make cookies feel even more special is by going the extra mile and using an embossed rolling pin to stamp gorgeous designs onto the dough. It really kicks the presentation up a notch, resulting in cookies that somehow manage to feel both homemade and professional.
Using an embossed rolling pin to press gorgeous, ornate designs onto your baked goods will not only give them that next-level finish, but is also a great way to leave a personal mark on your food. People will know exactly whose cookies these are at the next company potluck. Soon enough, it will be regarded as a personal trademark, almost like a signature that you’re leaving on your cookies. You’ll wonder how you went so many years without using one.
You can find beautiful rolling pins with gorgeous embossed designs at Embossed Co. Once you’ve found a rolling pin with a design you’re happy with, it’s time to start putting it to use. Below you’ll find our list of five embossed rolling pin recipes that you can use to elicit that sudden rush of child-like glee from your guests.
Recipe 1: Stamped Vanilla Almond Cookies
This is an absolutely delicious, super straightforward recipe that takes really well to the rolling pin.
Ingredients
Royal icing
- 1 cup confectioner's sugar
- 1½ tbsp meringue powder
- ⅛ cup warm water
-
¼ teaspoon vanilla extract (non oil based)
Cookies
- 1 cup unsalted butter, softened
- 1 cup brown sugar
- 1 large egg
- 1 teaspoon vanilla
- ½ teaspoon almond extract
- 2½ cup flour
- 1 teaspoon baking powder
-
½ teaspoon salt
Instructions
First, let’s make the cookie dough. Combine butter and brown sugar using an electric mixer until it reaches a fluffy consistency. Beat in egg, vanilla, and almond extract. In a separate bowl, combine flour, baking powder, and salt. Add flour mixture ½ cup at a time. Blend these ingredients thoroughly.
Knead the dough into a ball, then refrigerate it for 3-4 hours. Use a cookie cutter to cut circles out of the dough, then place them on a cookie sheet. Next, press your embossed rolling pin firmly onto the circle. This works best if the dough is firm, so you might want to work with small batches to keep it from becoming too pliable -- the cookies will still come out great, but the stamp won’t be as noticeable. Preheat your oven to 325 degrees F. Bake for 12 minutes, then leave on rack to cool.
We are topping these cookies with a Royal Flood icing. If you want to get fancy with the colors, you can even apply a few drops of food coloring to your bowl of icing.
To make the icing, use a paddle attachment. Mix sugar and powder, then add vanilla. Mix on medium-high for about 7 minutes.
Add ½ tbsp of water at a time until the icing has reached an almost shampoo-like consistency. Next, use your pastry brush to brush the icing on the top and sides of the cookie. You want to make sure it really gets in the rolling pin stamp. The amount of icing you use will, of course, affect how noticeable the stamp is. Play it by ear! See what looks best to you.
Then simply allow the icing to completely harden. And voila! Delicious vanilla almond cookies with Royal icing and a beautiful embossed rolling pin design.
Recipe 2: Embossed Spiced Brown Sugar Cookies
Here's another delicious recipe for gorgeous embossed cookies. This one, with its warm and fragrant spices, is best suited for the winter months.
Ingredients
- 150 gm unsalted butter
- 1 1/4 cups dark brown sugar
- 2 eggs
- 2 tsps vanilla extract
- 1/2 teaspoon baking powder
- 1/4 teaspoon baking soda
- 1/4 teaspoon salt
- 3 1/4 cups all-purpose flour
- 2 tsps cinnamon ground
- 1 teaspoon nutmeg finely grated
- 1/2 teaspoon cloves ground
- 3/4 teaspoon ginger powdered dried
- 1/2 teaspoon anise seeds powdered
- 1/2 teaspoon black pepper finely crushed
Instructions
Use a handheld electric mixer to cream together the sugar and butter until it’s fluffy and pale in color. Add in the eggs and vanilla extract and mix well. Sieve the flour, baking powder, baking soda and salt together. Add this to the creamed mixture and beat until just combined.
Shape the dough into a disc, cover it with plastic and refrigerate the dough for 3-4 hours, to make it easier to handle and more sensitive to the embossed rolling pin stamp. Divide the dough into two and work with one portion at a time. Lightly dust your work surface and rolling pin with flour and roll out the dough evenly to 1/4" thickness.
Use your embossed rolling pin to apply the stamp to the dough. Keep in mind that if the pattern is not deep enough, it will disappear during the baking process. Make sure the pattern completely covers the surface of the rolled out dough.
Use your cookie cutters to cut out shapes, leaving about an inch between them. Place the cut out cookie dough in the fridge for about half an hour. Then bake for 10 to 15 minutes at 350F, until the edges of the cookies start to brown. Let the cookies cool completely and enjoy!
Recipe 3: Chocolate Springerle Cookies
Now we head over to Germany for this chocolatey twist on a Bavarian classic. Traditional Springerle biscuits are anise-flavored, but here we’ll be trying something a bit different. Thanks to Gail's Goodies for this particular recipe!
Ingredients
- 3 cups all-purpose flour
- ½ cup cocoa
- 1 teaspoon baking powder
- ½ teaspoon salt
- 1 cup butter
- 1 ½ cup sugar
- 2 large eggs
- 1 teaspoon vanilla extract
Instructions
First, line a cookie sheet with parchment paper.
Mix together flour, cocoa, baking powder and salt. In a separate bowl, cream together butter and sugar, then beat in eggs and vanilla. We’re going to then mix in flour mixture one fourth at a time.
Wrap dough in plastic wrap and refrigerate 2-3 hours. When your dough is ready, roll it out with a plain (not embossed!) rolling pin to about ¼ inch thick. Make sure the top is floured. Then use the embossed rolling pin to imprint the design on the dough. The final thickness should be about 1/8 inch thick. Then use your cookie cutters to cut out cookies.
Bake at 375 degrees F for 10-15 minutes, then cool on wire racks. There you have it! Embossed Chocolate Springerle cookies. Absolutely delicious.
Recipe 4: Speculaas Gingerbread Cookies With Rum Butter Glaze
Is there a more pleasing combination of words in the English language than “rum butter glaze”? It just rolls right off the tongue. This rich, out-of-this-world recipe will make your cookies the talk of the town.
Ingredients
Spice blend
- 1 teaspoon ground ginger
- 1 teaspoon ground cinnamon
- 1 teaspoon ground cardamom
- 1/2 teaspoon anise seed
- 1/4 teaspoon ground white pepper
- 1/4 teaspoon black pepper
- 1/4 teaspoon nutmeg
- 1/4 teaspoon cloves
Cookies
- 6 tbsp unsalted butter at room temperature
- 1/3 cup plus 2 tbsp packed dark brown sugar
- 1/4 cup blackstrap molasses
- 1 large egg yolk
- 1 3/4 cups plus 2 tbsp all-purpose flour, plus more for dusting
- 1 tbsp Dutch process cocoa powder
- 1/2 teaspoon baking powder
- 1/4 teaspoon salt
Rum butter glaze
- 2/3 cup confectioner’s sugar
- 1/8 teaspoon ground cinnamon
- 1 tbsp unsalted butter, melted and warm
- 1 tbsp dark rum or lemon juice
- 1 teaspoon warm water
Instructions
First, let’s make the cookies.
Blend all the spices together in a small bowl. Put the bowl aside. Place the butter, sugar and molasses in the bowl of an electric mixer with the paddle attachment and beat on medium speed until it’s smooth and fully incorporated. Add the egg yolk and continue to beat until fully combined.
Sift the baking powder, spice blend, cocoa powder, flour, and salt together in a bowl. Set the speed to low and add flour mixture to the butter and molasses. Then place the dough onto a floured surface and knead gently.
Roll out the dough until it’s about 1/4 thick. Preheat the oven to 375 F and line two baking sheets with parchment paper.
Dip the embossed rolling pin into the flour. Shake off any excess, then press it firmly into the dough to create the imprint. As always, keep in mind that the cookies will rise and puff up in the oven, so you want as deep an impression as possible.
Use your cookie cutter to cut out the cookies, surrounding the stamped pattern. You can also cut out cookies throughout the pattern. Move the cookies to the baking sheets, leaving 3/4 inch space between each.
Bake for 9-10 minutes, rotating sheets halfway through the baking time, until the cookies are firm. Remember that they will continue to firm up as they cool off.
While the cookies are in the oven, we can create the rum butter glaze. We’re going to be brushing it on while the cookies are still warm out of the oven.
First, sift the sugar and cinnamon in a small bowl. Then gradually add the rum, melted butter, and water. Mix it until it reaches a smooth consistency. Keep in mind that the glaze will thicken if you let it sit around, so stir in some more water if you need to.
Once you’ve removed the cookies from the oven, let them cool for 5 minutes, then brush the cookies with the glaze. Again, make sure to get it in those crevices we made with the embossed rolling pin.
Recipe 5: Lemon & Cardamom Gingerbread
If you’re anything like me, the idea of a lemon & cardamom gingerbread cookie is already a slam-dunk. Add in an ornate embossed rolling pin design and you’ve got an absolute winner. This recipe is much simpler than you might think.
Ingredients
Cookies
- 75g softened unsalted butter
- 100g dark brown sugar
- 2 teaspoon ground ginger
- 1 teaspoon ground cinnamon
- 1 teaspoon ground cardamom
- 75g golden syrup or honey
- 1 small egg
- 1/4 teaspoon salt
- 250g all purpose flour
- 1/2 teaspoon baking soda
- 1/2 teaspoon baking powder
Glaze
- 200g powdered sugar
- lemon juice
Instructions
Cream together the butter, sugar, and syrup in a large bowl until it is smooth, then beat in the egg. Add the salt, ginger, cinnamon and cardamom to the bowl, making sure to mix it in well. Add the flour, baking soda and baking powder and mix together until you form a soft dough. Then chill the dough for at least 2-3 hours until it’s firm.
Preheat the oven to 350 F. Split the chilled dough in half. Roll out one half on a large piece of baking paper, sprinkling with flour underneath and on top, using a lightly floured rolling pin. Roll until the dough is about 1/8 inch thick.
Use your embossed rolling pin to imprint your design, then use your cookie cutters to stamp out the shapes.
Transfer the cut shapes to a baking tray lined with baking paper. Bake for 8 minutes, then move to a wire rack to cool. Repeat the rolling and cutting with the rest of the dough.
Put your icing sugar into a medium bowl. Add lemon juice, 1 teaspoon at a time, until you get a thin glaze. Dip the top of each cookie into the glaze, making sure that it coats it. Then place them glaze-side-up onto a wire rack to let the excess drip off. The glaze will take at least an hour to set.
Did You Enjoy This Article?
Thank you for reading! If you enjoyed this article, you might also like the following article: Using Your New Embossed Rolling Pin
6 comments
Oct 23, 2023 • Posted by Alberta Jameson
Sounds great and a must try.
Oct 13, 2022 • Posted by Sharon
Great sounding recipes. I am going to try some!
Jan 20, 2021 • Posted by Embossed Co.
Hi Linda, thanks for your question! A “g” refers to a gram in the metric system, and 85 grams is equal to approximately 3oz in the imperial system. Hope that helps!
Jan 19, 2021 • Posted by LINDA ZELLWEGER
how do you transfer the measurements to know what 75g or 100g is, what is a G
Mar 06, 2020 • Posted by Embossed Co.
Hi Carol Lasky, we’re happy to help! Thanks for stopping by!
Mar 06, 2020 • Posted by Carol Lasky
The ones I ordered are great, but they came with not instructions, recipes or care of them.
Thank heavens I could google this site to obtain all I needs.
Leave a comment: